[Answer ID: 6103]
Configuring router on initial setup
Created 02/03/2011 12:45 | Updated 05/11/2012 10:53
To configure your AirStation, follow the procedure below.
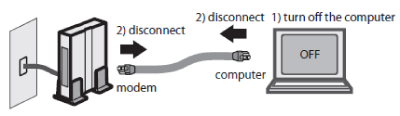
[Before you begin setup]
- Turn on your computer.
- Unplug the LAN cable which connects your computer and modem.
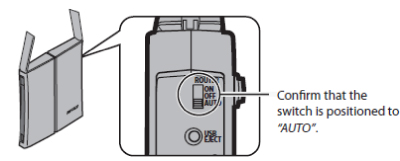
- Make sure the mode switch on the back of the AirStatioin is in the AUTO position.
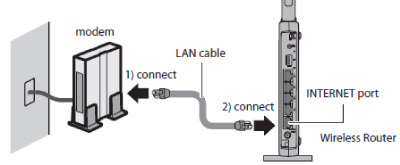
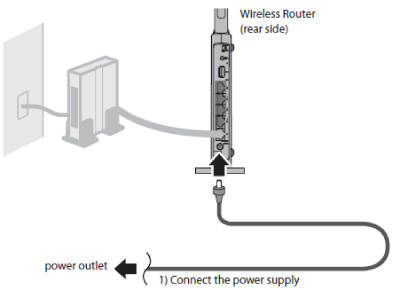
- Plug one end of the LAN cable into your modem and the other side to the Internet port of the AirStation. Turn on your modem.
- Connect your computer to one of the AirStation's LAN ports with the LAN cable.
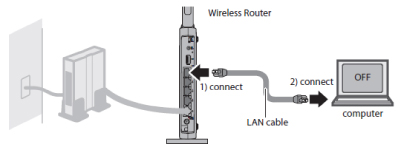
- Turn on the AirStation, wait one minute, and then turn on your computer.
- Once your computer has booted, the AirStation's LEDs should be lit as described below.
POWER
Green LED: on WIRELESS Green LED: on or blinking ROUTER Green LED: on or off
* depending on your network.DIAG Red LED: off LAN Green LED: on or blinking INTERNET Green LED: on or blinking
[Installing and Setting up the Wireless Router]
- Launch a web browser after you connect your computer to the router wired or wirelessly. (Internet Explorer, Firefox, Google Chrome etc.)
- After you open the browser,
In case that you see the following window
The Internet connection has not been established yet.
Continue your setup following these steps.
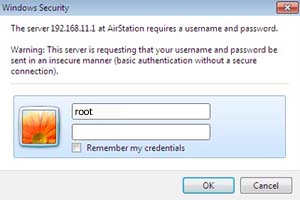
Enter root for a username, and leave a password field blank.
Click [OK], then.
Note:
By default, the username is root, and the password is blank (not set). If you forget your password, hold down the Reset button to initialize all settings.
The password will then be initialized.
Continue your settings along the following steps.In case that you could reach to any website
The Internet connection is established correctly.
The configuration is completed.
-
You will see the following message; "Checking the internet type automatically./Please wait."
Wait until the page goes to next. -
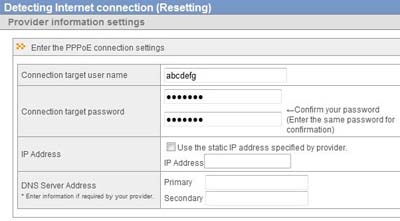
Enter your WAN side setting parameters in each fields based on the e-mail or documents from ISP, and then click [Next].
-
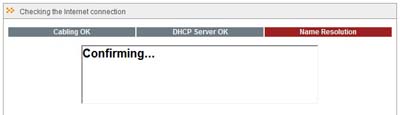
The router starts checking the Internet connection.
Wait until the page goes to next.
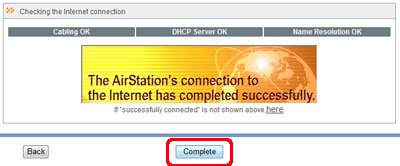
-
When you see the following screen, the Internet connection has been established properly.
Click [Complete].
-
Check if you can access to the Internet.
Details
Products
OS / Hardware
Was this answer helpful?
Please tell us how we can make this answer more useful.