[Answer ID: 13800]
How do I exchange the internal hard disks of CloudStation? (CS-WV, CS-WX Series only)
Created 11/21/2011 13:47 | Updated 03/09/2012 12:32
NOTE
|
| Replace a defective internal hard drive |
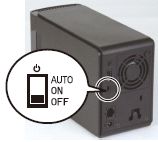
- Shut down the LinkStation by moving the switch to Off position and remove all cables.
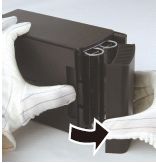
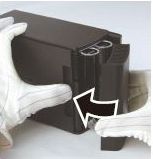
- Pull the front cover forward while pressing gently on the hollow on the left side.

- Remove the front cover.
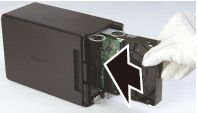
- Pull out the tab above the failed drive while pressing the release below the drive.
The tab will slide out approximately 2 cm (1 inch).
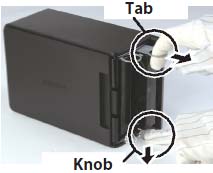
Note: Take care that your finger is not pinched between the tab and the drive. - Remove the failed drive.
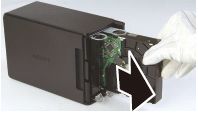
- Insert the new drive until it clicks.
- Reattach the front cover.
- Reattach all cables and power on the LinkStation.
| Rebuild the RAID array |
If your CloudStation is in RAID 1, follow the steps below.
- Navigate to [System]-[Storage] after logging in to the local Web interface, and then click [Click here].
Click here to refer to how to access the local Web interface.
- Click [Yes] on the screen after you read the notification about the data lost.
After you click [Yes], RAID rebuilding will be started.
You can refer the progress for RAID rebuilding shows on the local web UI.
RAID rebuilding starts after the progress get to 100%.
Details
Products
OS / Hardware
Was this answer helpful?
Please tell us how we can make this answer more useful.