[Answer ID: 12656]
How can I connect the wireless AP to the internet by using Setup CD?
Created 06/09/2011 15:06 | Updated 11/05/2012 16:08
| NOTE: This is the way to set up the AisStation on Buffalo User-Friendly firmware. |
- Insert the CD, which comes with the product, into the drive of the computer. The CD contains the software from which you can run the AirStation Setup Wizard.
- The screen below appears.
Select your language and press the [Start] button to begin the setup.

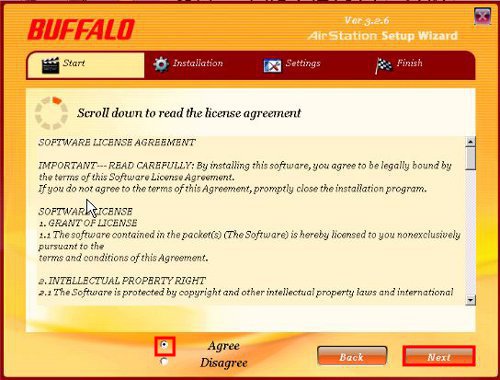
- Read the license agreement. Check [Agree] and click [Next].
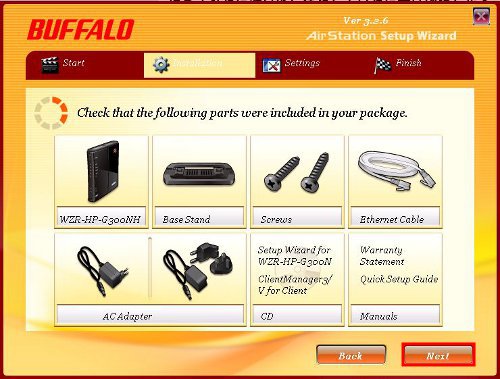
- Check the following parts were included in your package. And click [Next].
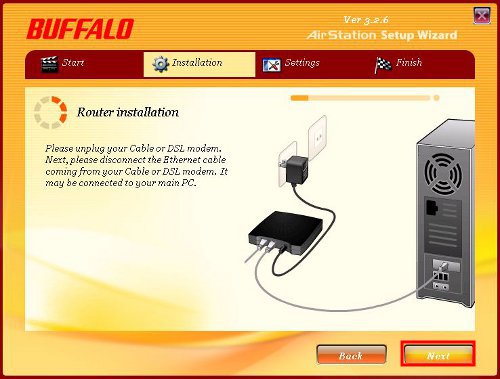
- Unplug your Cable or DSL modem. Next, disconnect the Ethernet cable coming from your Cable or DSL modem. It may be connected to your main PC. Click [Next].
- Attach the stand to the bottom of the router. Click [Next].
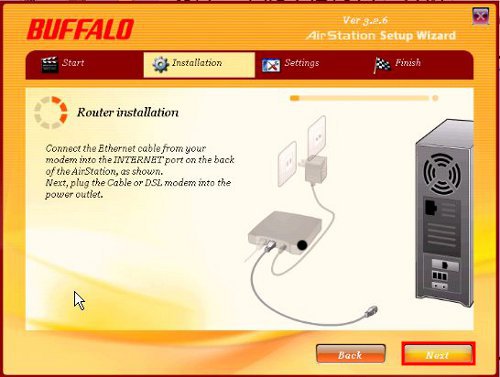
- Connect the Ethernet cable from your modem into the INTERNET port on the back of the AirStation, as shown. Plug the Cable or DSL modem into the power outlet. Click [Next].
- Plug the Ethernet cable supplied with your AirStation into your desktop or notebook’s Ethernet port. Click [Next]
- Plug the AirStation’s power supply into an AC power source. Next, plug the AirStation power supply into the AirStation’s power socket. Click [Next].
- Check the LED lights on the front of the AirStation. And click [Next].
Default LED activity:
Power - Solid Green
Wireless - Off during boot up, On after boot up
DIAG - On during boot up, Off after boot up
*Wait until the DIAG light switches off before proceeding to the next step.
- Access to the AirStation’s administrative Web Interface can be password protected. You can leave this password blank but we recommend you choose a secure password containing letters and numbers. However, make sure to remember the password.
If you have configured password previously and do not remember this password, please reset the router to factory default settings and restart this setup wizard. After typing the password, please click the Next button to proceed.
Enter a password of up to 8 alphanumerical characters including an underscore "_".
Click [Next].
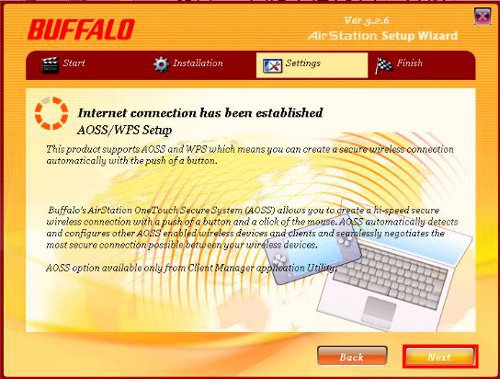
- When the screen below appears, the internet connection has been established. Click [Next].
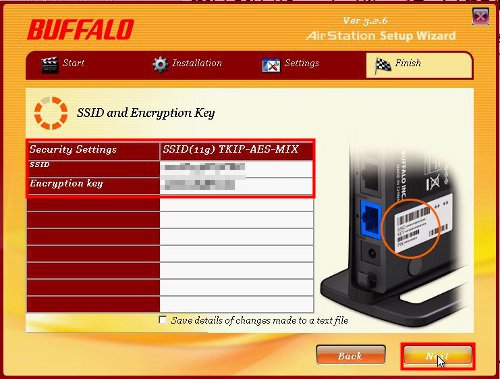
- Check the SSID and the Encryption Key shown in the screen. And click [Next].
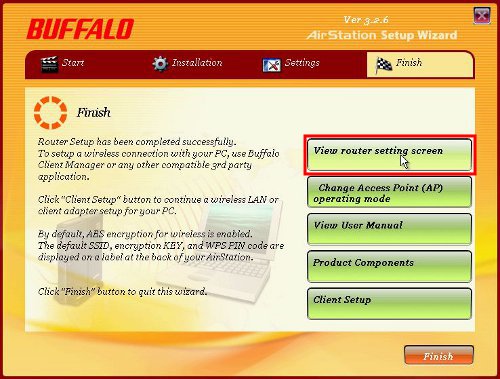
- When the screen below appears, the Router Setup has been completed successfully. Then, click [View router setting screen].
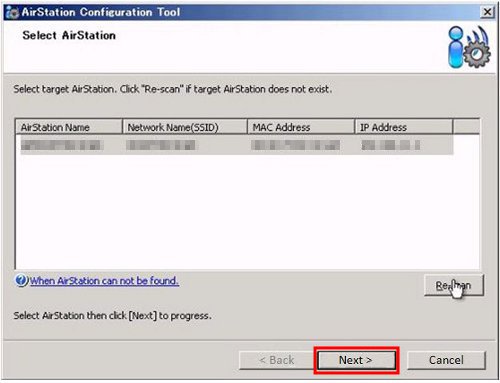
- Select your AirStation, and click [Next] to progress.
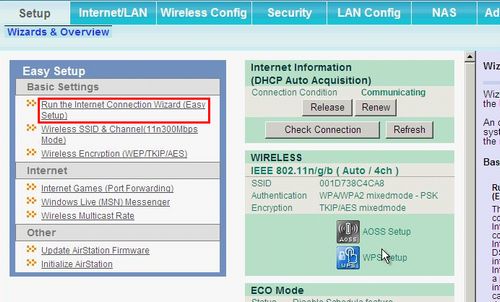
- When the AirStation configuration screen appears, select [Run the Internet Connection Wizard (Easy Setup)] in the screen.
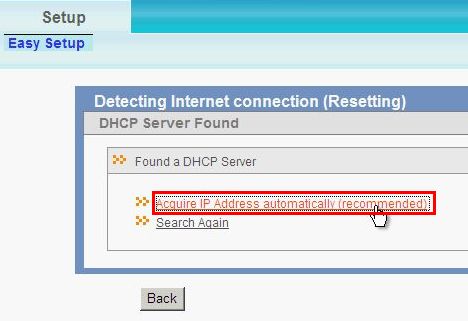
- In the next screen, select [Acquire IP Address automatically (recommended)].
- When the message "Successfully Connected" appears in the screen, click [Complete].

- Open the browser (Internet Explorer etc.) again to see if the network is connected.
Details
Products
OS / Hardware
Was this answer helpful?
Please tell us how we can make this answer more useful.